Masonry Charleston SC is a construction method that uses bricks, stones, and concrete blocks to construct walls. It is reinforced with mortar and often used in historic preservation projects.

Unlike wood frame construction, masonry structures are durable and long-lasting, which can reduce maintenance costs over time. However, constructing a masonry structure requires strict compliance with building codes and regulations.
Masonry involves building structures with individual units of material such as stones, bricks, concrete blocks, glass block or adobe, bound together by mortar. This construction technique has spanned many geological periods and has allowed people to create some of the world’s most famous buildings and monuments. In addition to being durable and versatile, masonry offers both aesthetic and structural integrity to a building, combining beauty with functionality. Today you can see the work of masons in everything from historic landmarks to modern homes.
Early masons sought to emulate nature. Observing natural caves, they built their first stone shelters on the Aran Islands in Ireland. The Egyptians further advanced the art, using sandstone to build the pyramids. Later, different geographic regions began to create their own masonry styles. The use of stone, sand, and bricks developed into unique styles throughout the world.
In modern times, masons have embraced new advancements in materials and technologies. Innovative developments like self-healing and insulating concrete have expanded the possibilities of architectural design. Architects can now design buildings that blend beautifully with their surroundings and are more energy efficient.
While it is not possible to know exactly when masonry was first used, we do know that Freemasonry is one of the oldest fraternal organizations in the world. It has never presented itself as a religion but rather as a place for men to come together in brotherhood, share common values and discuss spiritual matters in comfortable fellowship.
Masonry has also helped to create some of the most famous landmarks in history, including the Colosseum, the Taj Mahal and the Great Wall. In fact, masonry is the oldest and most enduring building material in human history.
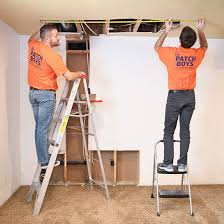
It’s important to take safety precautions when working with masonry. It’s estimated that 60,000 people die on construction sites each year. Many of these deaths are caused by masons and drywall installers, who are most likely to be injured because they handle large, heavy objects. In order to protect yourself and others, be sure to follow proper safety procedures and always work with a licensed professional.
Modern Masonry
Masonry is an ancient construction technique that has evolved with the needs of modern architecture. Today, architects and builders use innovative techniques to incorporate masonry into sleek and minimalist structures that reflect a contemporary aesthetic. They also rely on modern technologies like post-tensioning to deliver improved structural performance. In addition, they can take advantage of new waterproofing systems to ensure that masonry walls stay protected against moisture damage.
A growing trend in residential masonry features decorative stonework and geometric brick patterns that create a sophisticated and understated look. This style is especially popular in contemporary buildings that incorporate glass and masonry into a seamless design. This type of integration allows natural light to fill interior spaces while adding an element of transparency and visual interest.
Traditional masonry construction uses a wide variety of materials and techniques, including a mix of cement, lime, clay, aggregates, stones and bricks to construct buildings and other structures. These materials are extracted from surface pits and quarries and then fabricated into bricks and concrete blocks. Masonry techniques are often time-consuming and labor-intensive, but the resulting buildings are long-lasting and durable.
Modern innovations in masonry include the use of new cements and binders that reduce environmental impact and increase building energy efficiency. Masonry can also be insulated with new materials that improve thermal performance, reducing heating and cooling costs. Modern masonry is also available in prefabricated panels that can be assembled quickly on-site, allowing faster construction and lower cost.
Another important trend in modern masonry is the use of modern tools to make construction more efficient and safer. Modern masonry tools provide greater control over the cutting, shaping and placement of bricks and other materials, ensuring consistent quality throughout the build. In addition, new digital technologies can help masons plan and visualize construction projects before they begin. These technologies can even automate the laying of masonry units, ensuring that precise construction and installation is achieved.
The best masonry contractors are familiar with the latest trends in architectural designs and masonry construction. They can offer expert advice to clients, helping them select the most suitable styles and construction methods for their project. They can also assist in obtaining the necessary building permits and planning applications, making the entire process smoother for their clients.
Concrete Masonry
Concrete Masonry is an integral part of construction, bringing durability and strength to modern structures. It is also versatile, allowing architects to build in various styles and designs. Although the initial cost of a building made with masonry may be higher than other materials, its longevity and low maintenance requirements offset this upfront investment.
Masonry is a versatile and cost-effective choice for commercial, industrial, and residential structures. Its structural stability, fire resistance, termite-proofing, and low energy costs make it a popular building material. In addition, it is also environmentally friendly, reducing the need for chemical-based materials in construction.
Cement masons construct concrete masonry structures using blocks that are manufactured in accordance with industry standards. The production process begins with the precise measurement and mixing of essential ingredients such as Portland cement, aggregates (such as sand or gravel), and water. The cement mixture is then poured into molds that determine the size, structure, and shape of the finished concrete block. The blocks are then classified as hollow or solid according to the net concrete cross-sectional area of each unit.
Hollow blocks feature voids or cells that can be filled with insulation material, grout, or concrete to improve the acoustic and thermal properties of a wall. Solid blocks are denser and heavier than their hollow counterparts, making them more suitable for structures that require additional strength or structural integrity.
Once the blocks are assembled and cured, a mason can finish the walls by adding a decorative touch to the surface. This can include applying patterns, textures, or colorants to the concrete surface. In addition, cement masons often perform repair and restoration work on existing concrete structures.
In this role, masons evaluate the condition of existing concrete structures, identify damage and deterioration, and use techniques like patching or resurfacing to restore the structural integrity of a concrete wall. They may also apply protective coatings or waterproofing to prevent future deterioration.
Brick and Stone Masonry
Brick and stone are popular choices for constructing strong structures and homes. Both materials offer unique aesthetics and benefits to builders, but each type of masonry has its own strengths and weaknesses. Consulting with a professional mason is essential for choosing the right material for your construction project.
Brick masonry uses bricks bonded with mortar, which is typically made from cement or fly ash. Brick is more uniform in size and shape than stone, making it easier to work with. It is also cheaper to buy and install, as well as being fire-resistant and load bearing.
Stone masonry is a more traditional method, using natural stones of different sizes and shapes to create robust and aesthetically pleasing structures. It requires more skill to build with, as the stones must be carefully cut and fit together. Stone is more expensive to buy and install than brick, but it has a higher strength, resistance to weathering, and beauty. It can be used for a variety of purposes, from foundations to floors and sidewalks.
Both brick and stone masonry require regular maintenance to ensure they stand the test of time. Mortar takes the brunt of structural pressure, and if it begins to crack or crumble, the entire structure may be compromised. A masonry contractor can help repair damage to brick or stone walls, replacing any broken or cracked mortar and sealing the surface to prevent water leaks.
Different climates have a major impact on the performance and longevity of masonry materials like brick or stone. Temperature changes can cause the materials to expand and contract, which puts stress on the underlying structure and may result in structural damage over time. Regular inspections and maintenance by a masonry contractor can help avoid this damage, and ensure the structural integrity of a building or home.
Masonry is a physically demanding job, with masons regularly lifting heavy bricks and stones. In addition, they often work in crouched or kneeling positions for extended periods of time. This can lead to back and muscle strain, as well as joint discomfort and pain. Moreover, the use of tools such as power saws and drills can lead to hand-arm vibration syndrome (HAVS), which causes fatigue in the hands and arms. Consequently, regular maintenance and the use of ergonomic tools can go a long way in preventing injuries and health issues among masons.